QuickBooks Desktop Settings
Last updated: April 13, 2026
Overview
The QuickBooks Desktop Settings page is where you manage your QuickBooks Desktop (QBD) connection, configure how data flows between Procore and QuickBooks Desktop, and set up mappings for line items, projects, and vendors. You can access a separate settings page for each QBD connection your company has.
To open this page, navigate to Settings → Accounting Integrations, find the QuickBooks Desktop integration you want to configure, and click the Settings button (gear icon) next to it.
You must be a Procore Company Admin and have the accounting integrations feature enabled for your company to access this page. All settings on this page are restricted to admin users.
Integration Status

The Integration Status section at the top of the page gives you a snapshot of your QuickBooks Desktop connection and its current state. It displays the following information:
Field | Description |
Connected Company | The QuickBooks Desktop company file this integration is connected to. Shows the company name if available. |
Last Sync | The date and time of the most recent data sync from QuickBooks Desktop, or "Never" if no sync has occurred. |
Configuration Status | Shows "Configured" with a green checkmark if the Setup Wizard has been completed, or "Setup Required" with a yellow warning icon if it has not. |
Integration ID | The internal identifier for this integration. Useful when working with inBuild support. |
Connection Name | The name associated with this connection from the Conductor service. |
Conductor End User ID | The external user identifier from Conductor for this connection. |
Pausing and Resuming Sync
The QuickBooks Desktop Sync toggle controls whether data actively syncs between inBuild and QuickBooks Desktop. When you pause syncing, no bills or invoices will be sent to QuickBooks Desktop, but all your existing data and mappings are preserved.
Locate the QuickBooks Desktop Sync toggle at the top of the Integration Status section.
Click the toggle to switch syncing off (pause) or on (resume).
A confirmation toast will appear: "QuickBooks Desktop sync paused" or "QuickBooks Desktop sync enabled."
When sync is paused, an amber warning banner appears on the page reminding you that no data will flow to QuickBooks Desktop until you re-enable the toggle.
Syncing QuickBooks Desktop Data
The Sync QuickBooks Desktop Data button pulls the latest accounts, items, vendors, and other reference data from QuickBooks Desktop into inBuild. This keeps dropdown options and mapping lists up to date.
Click the Sync QuickBooks Desktop Data button.
A loading spinner will appear while the sync is in progress.
When complete, a toast notification will confirm: "QuickBooks data sync started successfully."
Reconnecting Your Account

If your QuickBooks Desktop connection has become stale or you need to re-authenticate, use the reconnect option.
Click the Start reconnection link in the Integration Status section.
You will be redirected to the Conductor authentication flow to re-establish the connection with QuickBooks Desktop.
After completing the authentication, you will be returned to inBuild.
Configuration
The Configuration section contains all the settings that control how inBuild translates and syncs your Procore data into QuickBooks Desktop. If you have not yet run the Setup Wizard, this section will show a Start Setup Wizard button instead of the settings described below.

The first three settings (Line Item Mapping, Mapping Granularity, and Project Strategy) are configured during the Setup Wizard and displayed here as read-only badges. To change them, you will need to go through the setup process again.
Line Item Mapping
This read-only setting shows how Procore line items are mapped to QuickBooks Desktop. It was set during the Setup Wizard.
Option | Description |
Product/Service Mapping | Procore line items are mapped to QuickBooks Desktop products and services (items). |
Expense Account Mapping | Procore line items are mapped to QuickBooks Desktop expense accounts. |
Mapping Granularity
This read-only setting shows the level of detail used when mapping Procore cost information to QuickBooks Desktop. It was set during the Setup Wizard.
Option | Description |
Cost Code | Maps by cost code only. |
Cost Type | Maps by cost type only. |
Cost Code and Cost Type | Maps by both cost code and cost type for more detailed tracking. |
Project Strategy
This read-only setting shows how Procore projects are represented in QuickBooks Desktop. It was set during the Setup Wizard.
Option | Description |
Customer | Procore projects map to QuickBooks Desktop Customers. |
Project | Procore projects map to QuickBooks Desktop Projects. |
Customer and Project | Procore projects map to both a QuickBooks Desktop Customer and a Project. |
Map QuickBooks Desktop to Procore Projects
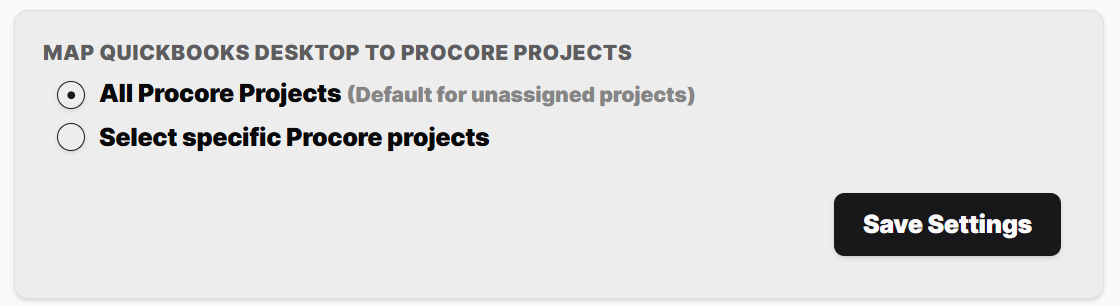
This setting controls which Procore projects are included in this QuickBooks Desktop integration. You can sync all projects or select specific ones.
Locate the Map QuickBooks Desktop to Procore Projects section.
Select one of the two options:
Option | Description |
All Procore Projects | Every Procore project in your company will be included in this integration. This is the default for new connections. |
Select specific Procore projects | Only the projects you check will be included. A scrollable list of all Procore projects appears with checkboxes. |
If you chose Select specific Procore projects, check the boxes next to each project you want to include.
Click Save Settings to apply your changes.
If a project is already mapped to a different QuickBooks Desktop integration, a yellow badge will appear next to it showing which integration it belongs to. Selecting that project here will reassign it to this integration.
Retainage Account / Retainage Item
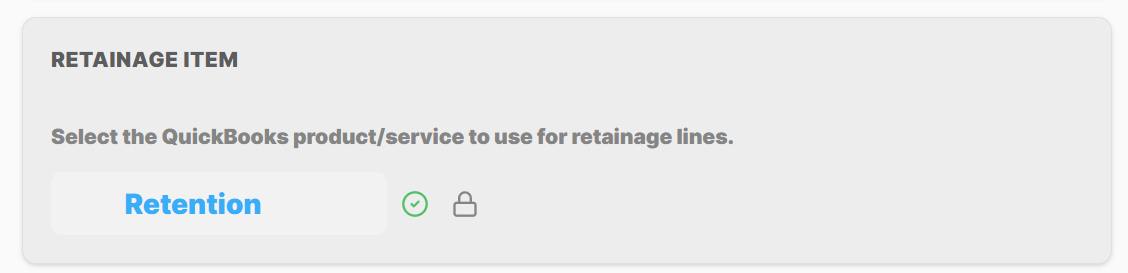
This setting determines which QuickBooks Desktop account or product/service is used for retainage lines on synced bills. The label and dropdown options change based on your Line Item Mapping mode:
If your line mapping mode is Expense Account Mapping, this field is labeled Retainage Account and shows QuickBooks Desktop expense accounts.
If your line mapping mode is Product/Service Mapping, this field is labeled Retainage Item and shows QuickBooks Desktop products and services.
To change this setting:
Click the lock icon next to the dropdown to unlock it.
Search for and select the appropriate account or item from the dropdown.
The setting saves automatically and the field re-locks to prevent accidental changes.
The retainage field is locked by default to prevent accidental changes. Changing this value affects how retainage lines appear on all future synced bills.
Overhead Project
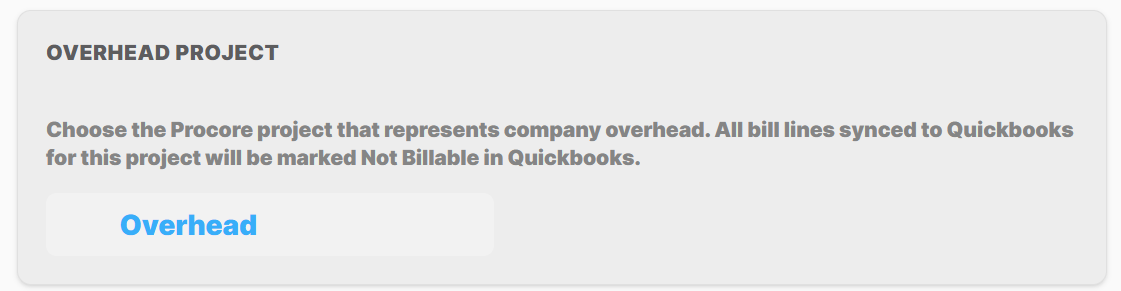
Designate one Procore project as your company's overhead project. All bill lines synced to QuickBooks Desktop for this project will be marked as Not Billable.
Open the Overhead Project dropdown.
Search for and select the Procore project that represents company overhead.
The setting saves automatically.
To remove the overhead project designation, clear the dropdown selection.
Billable Setting

The Bills are billable by default toggle controls whether bills synced to QuickBooks Desktop are marked as billable.
Enabled: All synced bills are marked as billable in QuickBooks Desktop, except for bills associated with the overhead project (which are always marked Not Billable).
Disabled: All synced bills are marked as not billable.
Bill Date Mode
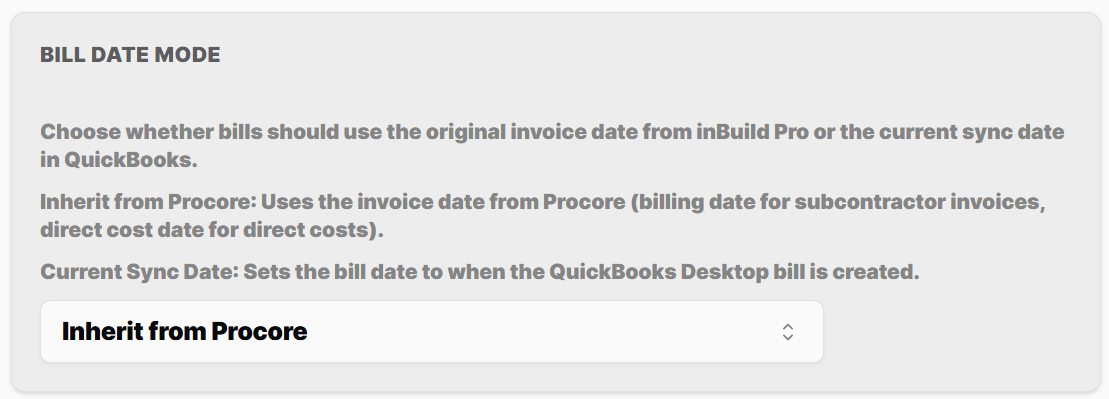
This setting controls what date is used as the bill date when bills are created in QuickBooks Desktop.
Option | Description |
Inherit from Procore | Uses the invoice date from Procore. For subcontractor invoices, this is the billing date. For direct costs, this is the direct cost date. |
Current Sync Date | Sets the bill date to the date and time the QuickBooks Desktop bill is created during sync. |
Consolidate Bill Line Items
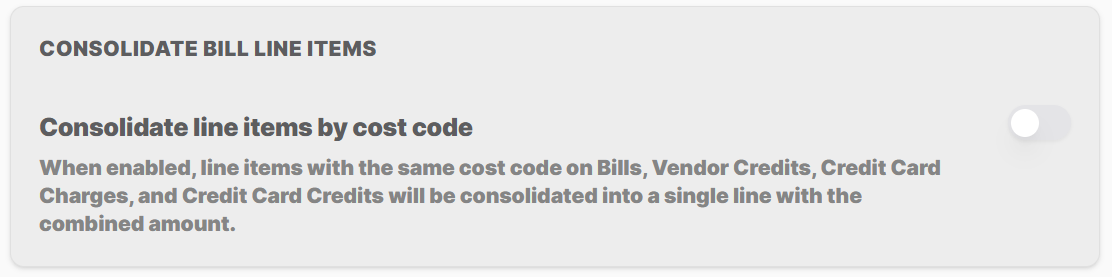
The Consolidate Bill Line Items toggle controls whether line items with the same cost code on Bills, Vendor Credits, Credit Card Charges, and Credit Card Credits are merged into a single line with the combined amount.
Enabled: Matching line items are consolidated into one line per cost code.
Disabled: Each line item is synced individually.
When this toggle is enabled, an additional dropdown appears:
Consolidated Line Item Description
This setting controls how descriptions are handled when multiple lines are merged into one.
Option | Description |
Keep first non-empty description | Uses the description from the first line item that has a non-empty description. |
Concatenate all descriptions | Combines descriptions from all merged line items into one. |
Leave blank | The consolidated line will have no description. |
Invoice Export Settings
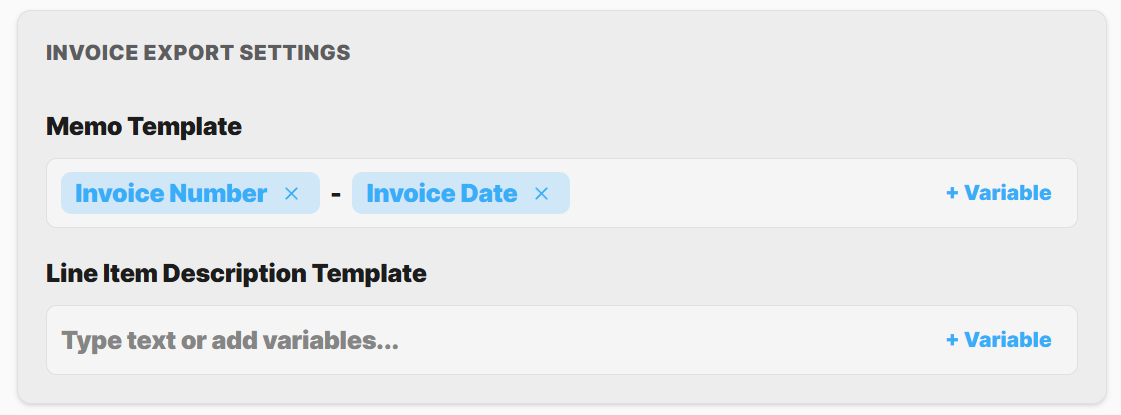
The Invoice Export Settings control how bill data is formatted when it is exported to QuickBooks Desktop. These settings use template editors that let you combine free text with dynamic variables pulled from your Procore data.
Memo Template
The Memo Template defines the content of the memo field on bills created in QuickBooks Desktop. You can type free text and insert dynamic variables that are replaced with actual data at sync time.
Click into the Memo Template text field.
Type any free text you want to include in the memo.
Click + Variable to open the variable dropdown.
Select a variable from the list. It will appear as a colored chip in the template.
Continue adding text and variables as needed. The template auto-saves after you stop typing.
To remove a variable, click the chip and delete it.
Available variables for the Memo Template:
Variable | Description |
Invoice Number | The invoice number from Procore. |
Invoice Date | The date of the invoice. |
Vendor Name | The vendor or subcontractor name. |
Total Amount | The total amount of the invoice. |
Project Name | The Procore project name. |
Billing Period Start Date | The start date of the billing period. |
Billing Period End Date | The end date of the billing period. |
Contract Number | The commitment or contract number from Procore. |
Line Item Description Template
The Line Item Description Template defines the description that appears on each line item of bills created in QuickBooks Desktop. It works the same way as the Memo Template, with one additional variable available.
This template supports all the same variables listed above for the Memo Template, plus:
Variable | Description |
Description | The original description from the Procore line item. |
Payments
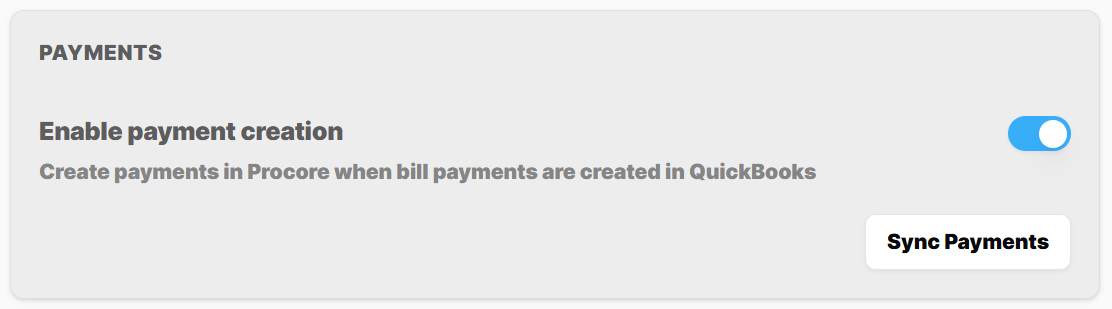
The Enable payment creation toggle controls whether payments are created in Procore when bill payments are recorded in QuickBooks Desktop.
Enabled: When a bill payment is created in QuickBooks Desktop, a corresponding payment record is created in Procore.
Disabled: Bill payments in QuickBooks Desktop are not reflected in Procore.
When payments are enabled, a Sync Payments button is available. Click this button to trigger a manual payment sync for this specific QuickBooks Desktop integration. A toast notification will confirm: "Payment sync started."
The payment creation setting is a company-level setting that applies across your integrations.
AR Invoice Settings
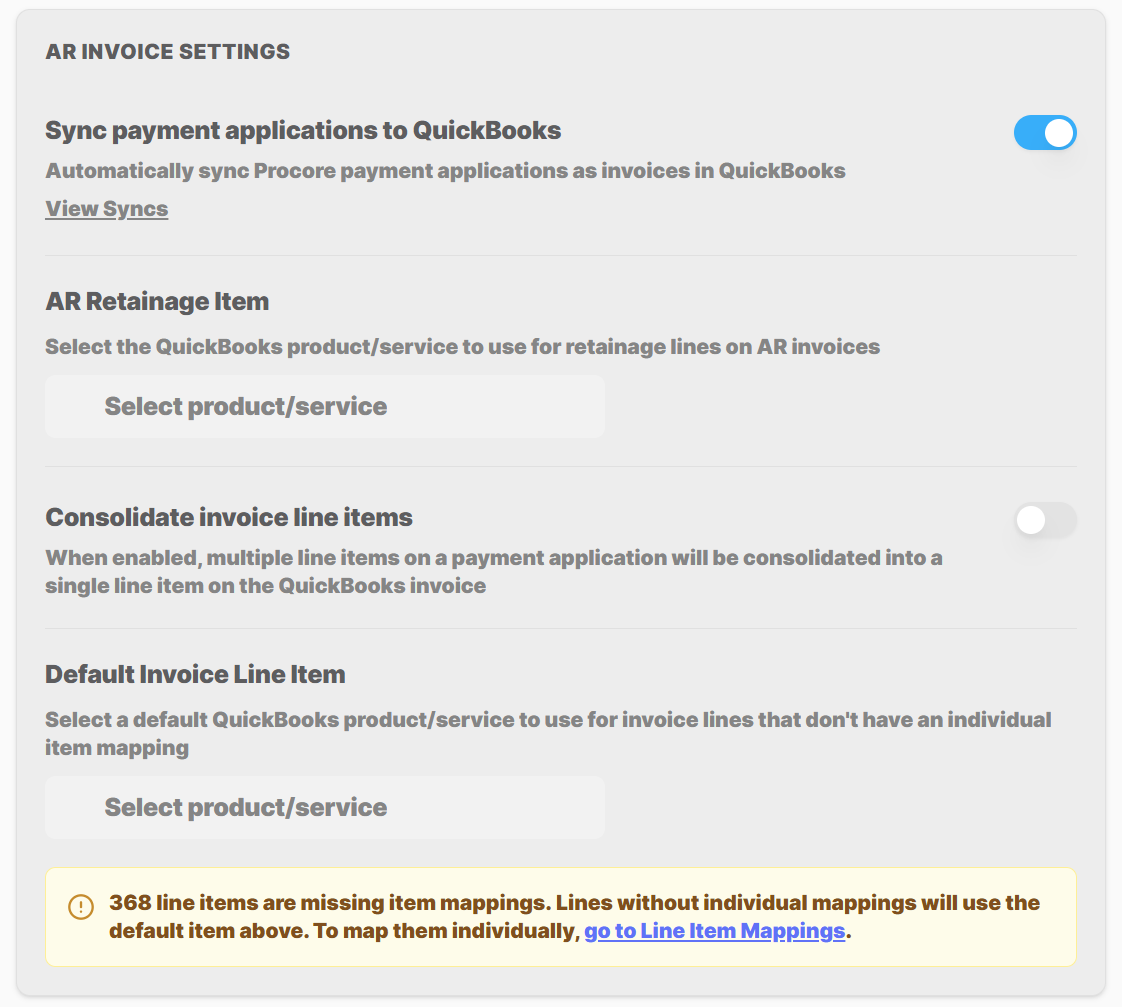
The AR (Accounts Receivable) Invoice Settings control how Procore pay applications are synced as invoices to QuickBooks Desktop.
Sync Payment Applications to QuickBooks
Toggle Sync payment applications to QuickBooks to automatically sync Procore payment applications as invoices in QuickBooks Desktop. When enabled, a View Syncs link appears that navigates to the payment applications page where you can monitor sync activity.
AR Retainage Item
Select the QuickBooks Desktop product or service to use for retainage lines on AR invoices. Open the AR Retainage Item dropdown and search for the appropriate item. This field is optional and can be cleared.
AR Retainage Item Tax Code
Select the QuickBooks Desktop tax code to apply to retainage lines on AR invoices. Open the AR Retainage Item Tax Code dropdown and search for the appropriate tax code.
The AR Retainage Item Tax Code and Default Invoice Line Item Tax Code dropdowns only appear if Canadian taxes are enabled for your company. If you do not see these fields, Canadian taxes are not active on your account.
Default Invoice Line Item Tax Code
Select the QuickBooks Desktop tax code to use for consolidated line items or markup line items on AR invoices. This dropdown is only visible when Canadian taxes are enabled.
Consolidate Invoice Line Items
The Consolidate invoice line items toggle controls whether multiple line items on a payment application are merged into a single line item on the QuickBooks Desktop invoice.
Enabled: All line items on a payment application are consolidated into one line. An additional dropdown, Consolidated Invoice Line Item, appears where you select the QuickBooks Desktop product or service to use for the consolidated line.
Disabled: Each line item is synced individually. A Default Invoice Line Item dropdown appears instead, where you select a fallback QuickBooks Desktop product or service for invoice lines that do not have an individual item mapping.
When Consolidate invoice line items is disabled and some line items are missing individual mappings, a yellow warning banner will appear showing the number of unmapped items. You can resolve this by going to the Line Items mapping page or by setting a default invoice line item.
QuickBooks Classes
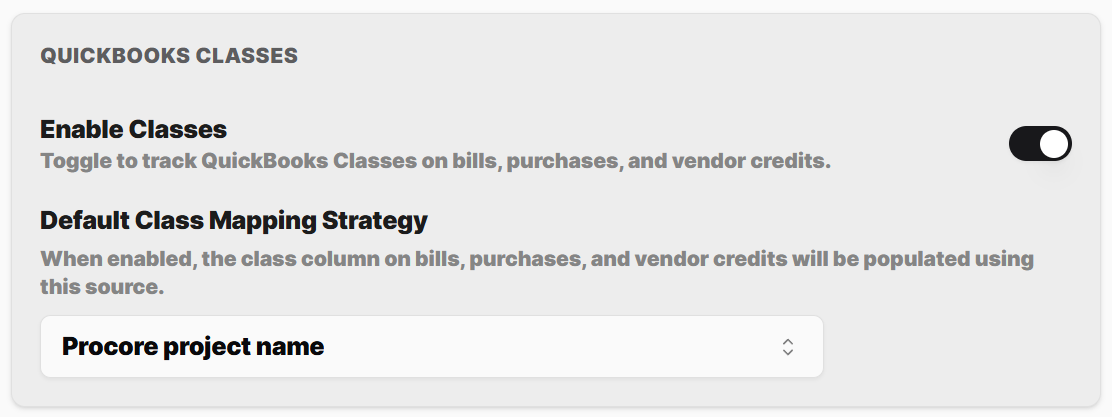
QuickBooks Classes allow you to categorize transactions for reporting purposes. These settings control whether and how classes are applied to bills, purchases, and vendor credits synced to QuickBooks Desktop.
Enable Classes
Toggle Enable Classes to turn class tracking on or off for synced transactions. When disabled, no class information is included on synced bills.
Default Class Mapping Strategy
When classes are enabled, the Default Class Mapping Strategy dropdown determines how the class value is populated on each synced transaction. This dropdown is disabled when classes are turned off.
Option | Description |
Procore project display name | Uses the display name of the Procore project as the class. |
Procore project name | Uses the project name from Procore as the class. |
Procore project description | Uses the project description from Procore as the class. |
Cost Type Name | Uses the cost type name from the line item as the class. |
Invoice Labels | Uses custom labels you define for overhead and non-overhead projects. When selected, two additional text fields appear (see below). |
Invoice Labels (Overhead and Non-Overhead Class Names)
When the Default Class Mapping Strategy is set to Invoice Labels, two text fields appear:
Overhead Project Class Name: The class name applied to transactions for your designated overhead project. Defaults to "Overhead" if left blank.
Non-Overhead Project Class Name: The class name applied to transactions for all other projects. Defaults to "Commercial" if left blank.
These fields save automatically when you click out of the field or press Enter.
Data Mapping Tables
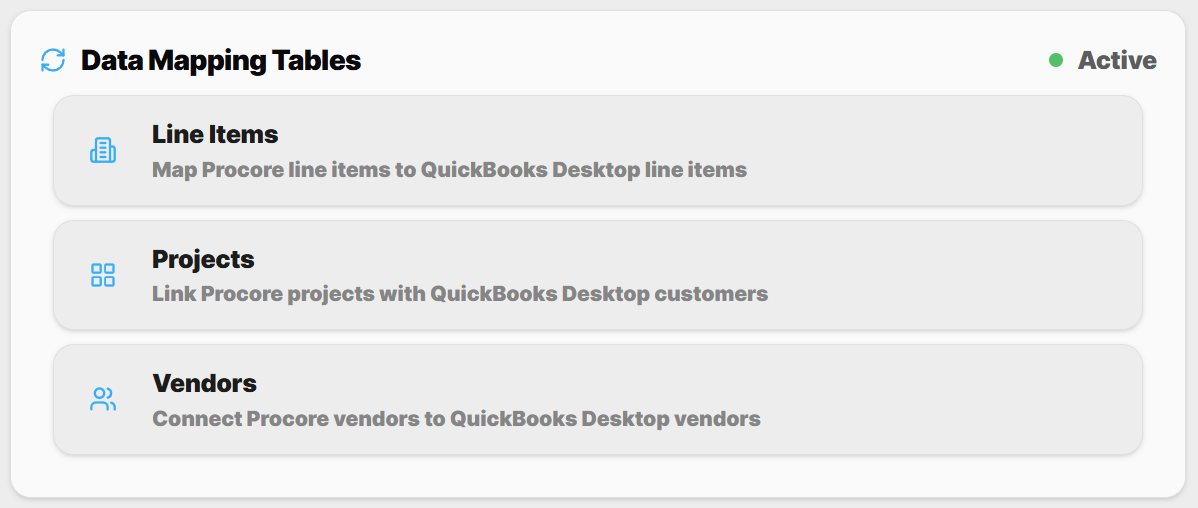
The Data Mapping Tables section provides access to three mapping pages where you connect your Procore data to the corresponding records in QuickBooks Desktop. These mapping pages are only accessible after the Setup Wizard has been completed.
Mapping Page | Description |
Line Items | Map Procore line items (cost codes and cost types) to QuickBooks Desktop products, services, or expense accounts. |
Projects | Link Procore projects to QuickBooks Desktop customers. |
Vendors | Connect Procore vendors and subcontractors to QuickBooks Desktop vendors. |
Click any of the three cards to navigate to the corresponding mapping page where you can review and update your mappings.
If the Configuration section shows "Setup Required," the data mapping cards will display a message indicating that you need to complete the Setup Wizard before you can configure mappings.
Frequently Asked Questions
Can I connect multiple QuickBooks Desktop company files at the same time?
Yes. QuickBooks Desktop supports multiple simultaneous connections. Each connection has its own settings page and data mappings. You can add additional connections by clicking Add Connection on the Accounting Integrations page.
Can I use both QuickBooks Online and QuickBooks Desktop at the same time?
No. Only one type of accounting integration can be active at a time. If you have a QuickBooks Online integration connected, you will not see the QuickBooks Desktop option, and vice versa. You must disconnect your current integration before connecting a different type.
What happens when I pause the sync toggle?
Pausing the sync stops all data from flowing to QuickBooks Desktop. No new bills or invoices will be synced. Your existing configuration, mappings, and previously synced data are all preserved. You can resume syncing at any time by toggling it back on.
Why are the Line Item Mapping, Mapping Granularity, and Project Strategy settings read-only?
These three settings are established during the initial Setup Wizard and are displayed on the settings page for reference. They define the foundational structure of how your data maps between Procore and QuickBooks Desktop.
What does the "Sync QuickBooks Desktop Data" button do?
This button pulls the latest reference data (accounts, items, vendors, and other lists) from your QuickBooks Desktop company file into inBuild. This ensures that your dropdown menus and mapping options reflect the most current data in QuickBooks Desktop. It does not push any data from inBuild into QuickBooks Desktop.
I do not see the tax code dropdowns in the AR Invoice Settings. Why?
The AR Retainage Item Tax Code and Default Invoice Line Item Tax Code fields only appear when Canadian taxes are enabled for your company. If these fields are not visible, Canadian taxes are not currently active on your account. Contact inBuild support if you need to enable this feature.
What happens if I assign a project that is already mapped to another QuickBooks Desktop integration?
If you select a project that is currently assigned to a different QuickBooks Desktop integration, it will be reassigned to the current integration. The project will no longer sync through the previous integration. A yellow badge next to the project name indicates which integration it is currently mapped to before you make the change.
Who can access and modify these settings?
Only Procore Company Admins can access the Accounting Integrations pages and modify any settings. If you are not an admin, you will see a message indicating that only admin users can access accounting integrations.